Why Set Up Your Own VPN?
Imagine being able to access your home network securely from anywhere in the world. That’s what a personal VPN (Virtual Private Network) can do for you! Here’s why it’s awesome:
- Extra Security: It’s safer than leaving multiple network ports open.
- Controlled Access: Only you and those you trust can get in.
- Seamless Connection: Use your home network as if you were there, no matter where you are!
Choosing Your VPN Flavor
There are a few great options to pick from:
- OpenVPN: The trusted classic. Super secure, but can be a bit complex to set up.
- WireGuard: The new kid on the block. Fast, secure, and easier to configure.
- Tailscale: For those who want things simple. Almost no setup required! (You need to configure tailscale client on every host.)
Setting Up Your VPN: The Big Picture
- Install the VPN server
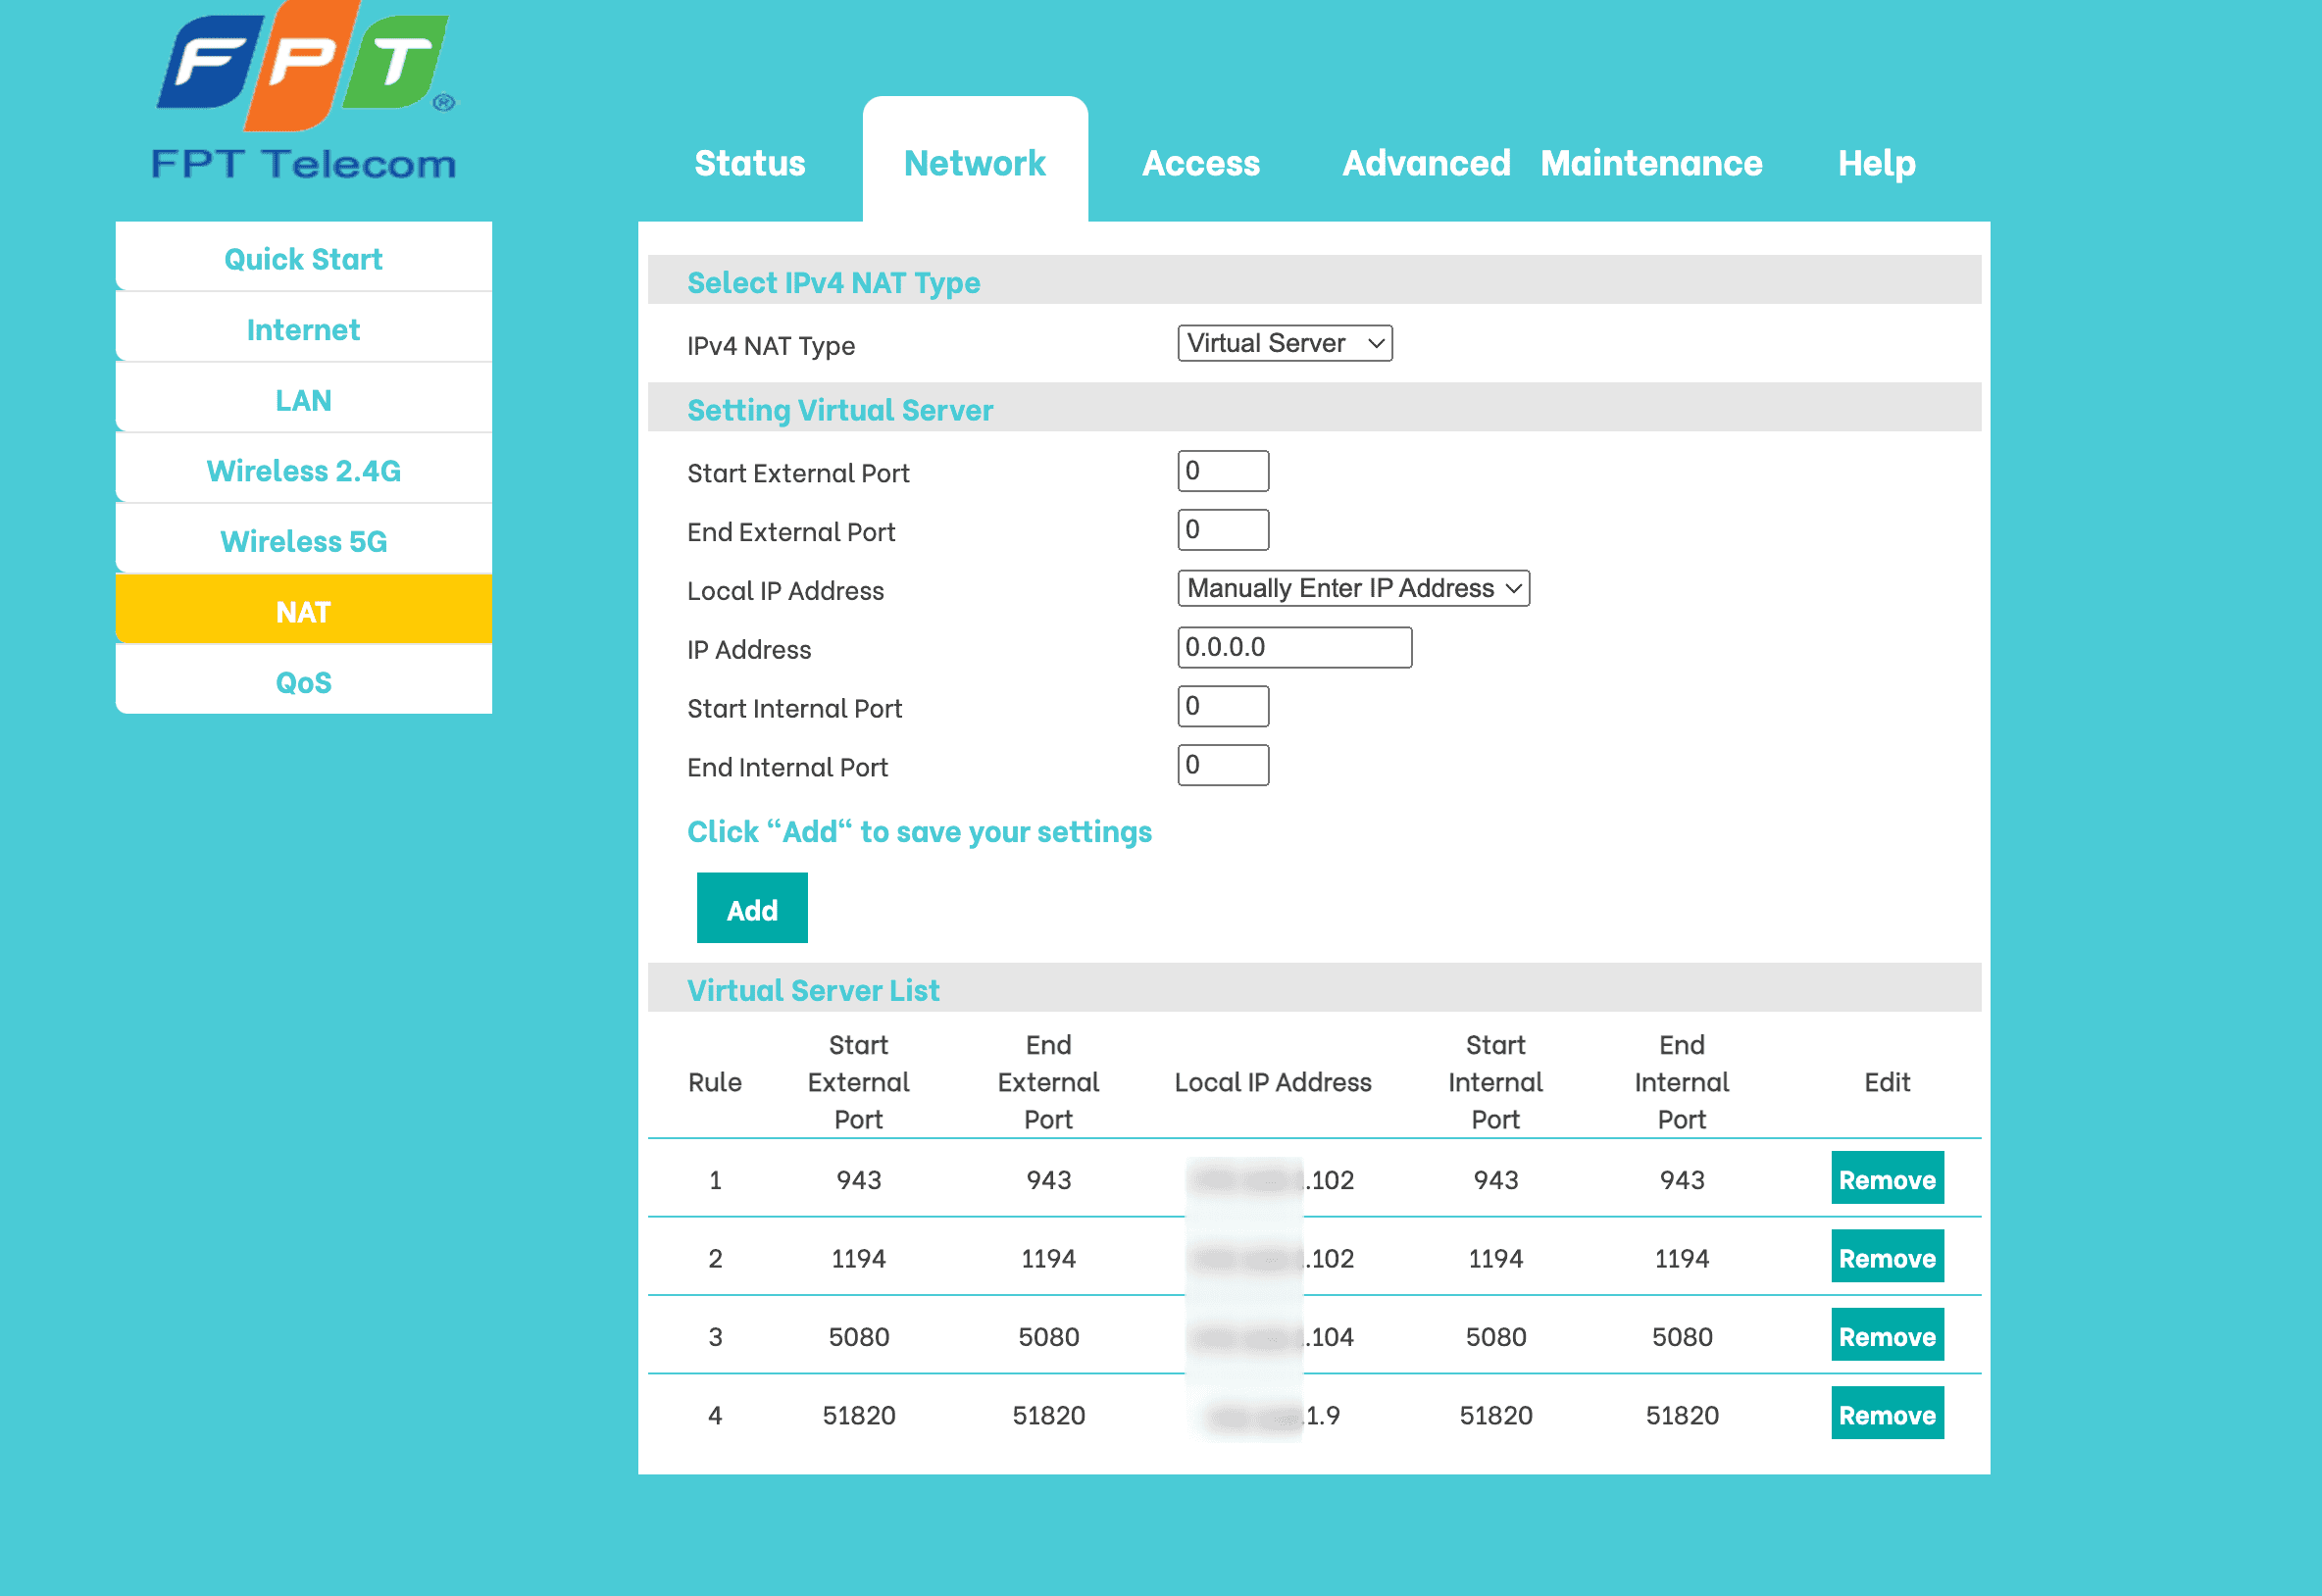
- Set up port forwarding on your router
- Set up a way to find your home network (using DDNS)
- Connect your devices to the VPN
A Quick Heads-Up: Avoiding Network Conflicts
As a noob, it takes me a lot of time to setup vpn network. I don’t know why my phone connect easily, but my laptop connects without any internet 😭
Your phone on cellular data uses different address ranges than your home Wi-Fi. While your laptop usually connect to a Wi-Fi network that has the same subnet with the VPN server’s, like WHY?
192.168.1.0. Don’t worry, there are ways to fix this!
How to Solve Network Conflicts
- Use Tailscale: It automatically avoids these issues.
- For OpenVPN or WireGuard:
- Choose a unique network range for your VPN (recommended)
- Or, change your home network’s range (but this can be tricky)
Step-by-Step Setup Guide
1. Installing Your VPN Server
We’ll use Proxmox as an example:
- For OpenVPN: Check out the Proxmox OpenVPN guide
- For WireGuard: The process is similar to OpenVPN
- For Tailscale: It’s super easy! Just two commands to get started
2. Setting Up Port Forwarding
Tell your router to let VPN traffic through:
- OpenVPN: Usually uses ports 443 or 1194
- WireGuard: Typically uses port 51820

3. Making Your Home Network Findable (DDNS Setup)
If your home IP address changes, DDNS helps your VPN stay connected:
No-IP: Free, but you need to log in regularly (I used to use it as it’s supported by my router)
DuckDNS: Also free, and doesn’t require logins (check if your router supports it)
Cloudflare DDNS: My current solution.
If you have a domain on cloudflare (zone), you could leverage its useful api to keep your domain’s ip updated. This can be achieved easily by cronjob, or a Docker container running at your host.
After this you could update your config file from step 1 to point to the domain name instead of IP.
4. Connecting Your Devices
- Get the VPN configuration file from your server
- Import it into a VPN client app on your device
- Connect and enjoy secure access!
For OpenVPN, I recommend Tunnelblick on Mac.
Making Sure It’s Working
To check if WireGuard is running properly:
wg show
This will show you connected devices and some stats.
Wrapping Up
Congratulations! You now have a personal VPN to securely access your home network from anywhere. This opens up a world of possibilities, like using your home Pi-hole ad-blocker on the go!